Tuesday, August 14, 2018

HOW TO BACKUP YOUR IPHONE ON ICLOUD & ITUNES 2019


It is very important to backup your phones just in case something happens, the phone could get stolen, it could crash or get damaged. Backing up your phone can save you a lot of headache. The only thing that most people worry about when a phone get’s damaged is how to recover all the data such as pictures, videos, music, contacts etc. In this post I will be showing you how to save all your data. There are two ways to backup your data if you use iPhone, the first is iCloud backup while the second method is iTunes backup.

Option 1: iCloud BackUp

iCloud is so simple and easy to use. When you sign in, you get 5GB of iCloud storage for free. But you know that’s a ridiculous storage space in 2018 where you have phones will 64GB, 128GB etc and it will not be enough back up your entire 16, 32 or 64GB iPhone . If you’re willing to pay a subscription fee of $1 a month, you could upgrade to 50GB of storage. You can even upgrade further to 200GB for $3 and 2TB for $10 per month, quite expensive. This saves everything on your iPhone including the settings, apps and most importantly,music, photos and videos.

How To Set Up iCloud:


Connect your device to a Wi-Fi or mobile network. Preferably 3G or 4G network.

Go to Settings > [your name], and tap iCloud. If you’re using iOS 10.2 or earlier, go to Settings, then scroll down and tap iCloud.

Tap iCloud Backup. If you’re using iOS 10.2 or earlier, tap Backup. Make sure that iCloud Backup is turned on.

Tap Back Up Now. Stay connected to your Wi-Fi or mobile network until the process completes.

To check progress and confirm that the backup is successful: Go to Settings > [your name] > iCloud > iCloud Backup. Under Back Up Now, you’ll see the date and time of your last backup.

Option 2: iTunes BackUp

iTunes lets you store as much data as you want for free, and it’s only for iPhones of course. The biggest downside, you have to do it all manually:


Open iTunes and connect your iPhone to your computer.

A message will pop up, asking if you want to Trust This Computer, tap “trust” or “allow”.

Select your iPhone when it appears in the sidebar of iTunes.

Click Back Up Now.For now, check:Free iTunes/iPhone Backup Extractor for iPhone, iPad

Jihosoft iTunes Backup Extractor is a powerful tool to recover and extract important data from iPhone, iPad & iPod touch backup on Windows or Mac.

The main advantage of iTunes is that it has free unlimited storage and saves everything on your phone.

Sunday, June 10, 2018

How to Remove Passcode from iPhone (iPad)


How to Remove Passcode from iPhone (iPad)


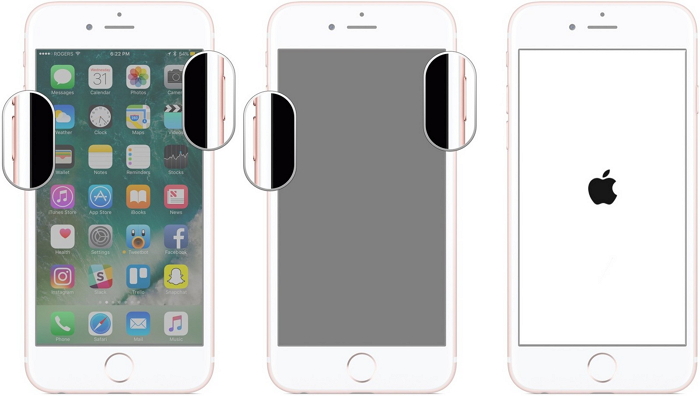
If you want to remove passcode from your iPhone or iPad, then it is recommended that you use the DFU mode. This is a common method to remove the passcode that many iOS users use. Follow these instructions:


Step 1. Connect your iPhone to your PC and open iTunes.


Step 2. Once your iPhone is detected in iTunes, open DFU mode on the device. Different iPhones require different methods to go into DFU mode. On iPhone 7/7 Plus, you will need to press the Volume Down and Side button and hold them until a recovery-mode screen appears.


Step 3. When an option to Update or Restore appears, choose Restore.


Step 4. iTunes will now begin the restoring process and download software for your device. Once the process is completed, the passcode will be removed and you will be able to set up your device with ease.


Do you like this story?


Sponsor Ads:
Gihosoft iPhone Data Recovery is a professional iPhone Data Recovery software to get back all your lost text message, photo, video, call history, note, contact and more from iPhone/iPad/iPod Touch. It offers a full solution to recover your lost data in different tough situations. Besides recovering data directly from iPhone, iPad and iPod touch, it also allows you to recover data from iCloud and iTunes backup files.

Tuesday, August 29, 2017

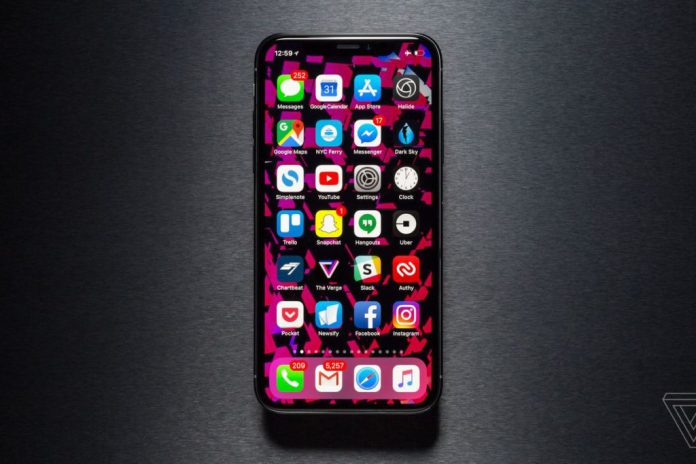
6 drastic changes those are coming to your iPhone with iOS 11

iOS 11 has been released at WWDC 2017 and the new OS is full of new and improved features.


If you own an iPad, iOS 11 is especially important. Many of the biggest changes introduced with this version of the iOS are designed to make the iPad an even-more-powerful productivity tool, maybe one that can even replace a laptop.

Today in this article, we are going to talk about 6 drastic changes those are coming to your iPhone with iOS 11.

Must Read: iOS 11 beta 7 introduced awesome new feature which will come to your iPhone

Instantly share WiFi passwords


Soon, you'll no longer need to save your WiFi password on a wrinkled piece of paper in a drawer somewhere. In iOS 11, if you need a WiFi password for a given network, just find someone who is already using the network and hold your device near theirs. The password will be transferred instantly.

The volume box is moving out of your way

Whenever you change the volume on your iPhone or iPad, a translucent box pops up in the middle of the screen. It's a bit annoying. Thankfully, Apple is redesigning the volume box in iOS 11.


New feature that could actually save your life

Distracted driving is a real, deadly problem. Thankfully, Apple has added a clever feature that lets the iPhone since it’s in a car to trigger “Do Not Disturb” mode, which can hide notifications for texts, calls, and other app messages while you’re driving. The feature can even notify people that you’re driving and will contact them soon.

Must Read: iPhone 8 concept design which will blow your mind

Notifications are getting simplified


In iOS 11, all your notifications — both recent and missed — are in one place; no separate tabs. Just pull down from the top of the screen to see everything at once.

iPhone keyboard is getting smarter

One of the signature features of Google Now is finally coming to the iOS ecosystem: When you type in iOS 11, the keyboard will suggest words you may have recently viewed on your phone from your Messages app, for example or Safari. So when your friend texts you the name of a restaurant, it may be one of the first suggestions when you start searching for that restaurant on the web. Also, the keyboard can now be used with one hand just hold the emoji key and select one-handed typing to move all the keys closer to your thumb. Jihosoft iPhone Backup Extractor Extract and recover all types of data from iPhone backup files, such as camera roll photos, videos, SMS, contacts, reminders, WhatsApp, and etc.
Gihosoft Free iPhone Data Recovery is a professional iPhone Data Recovery software to get back all your lost text message, photo, video, call history, note, contact and more from iPhone/iPad/iPod Touch.


Must Read:How to recover deleted text messages on iPhone 6 ?

Must Read: 8 iPhone & iPad features that will be added with iOS 11

Messages app is getting cleaned up


It felt like mayhem when Apple added the app drawer to its Messages app. Suddenly, you could add stickers and GIFs and all sorts of buttons and visuals to your messages, but all the new options weren’t totally easy to find and were somewhat overwhelming. Apple redesigned the app drawer in Messages for iOS 11, making it much easier to browser all the various stickers and emojis at your disposal.

Monday, August 28, 2017

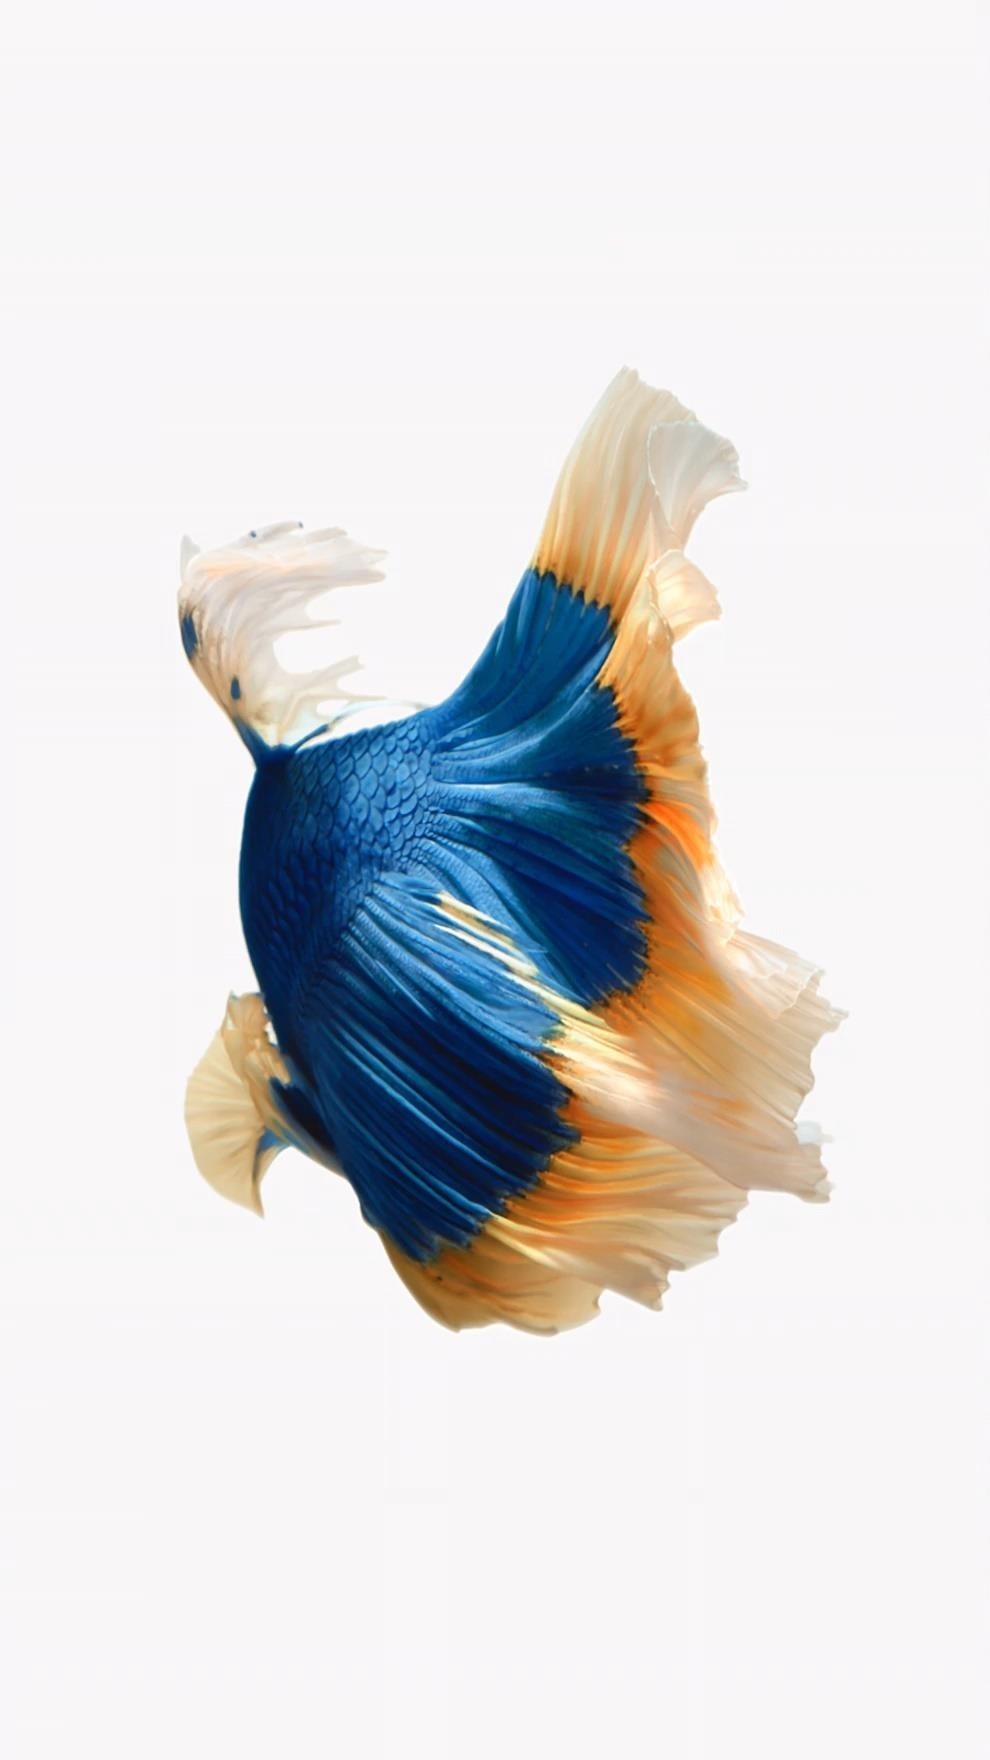
How To Get Back Apple's Live Fish Wallpapers on Your iPhone in iOS 11 ?


How To Get Back Apple's Live Fish Wallpapers on Your iPhone in iOS 11


In the latest beta for iOS 11, Apple removed the live fish wallpapers from the iPhone, so you can no longer set them as a live photo for your lock screen. If you really loved those fishies and want to see them animating again on your device, there is a way to get them back. Must Read:iMyFone D-Back iPhone Data Recovery–Recover Deleted Data from Your iPhone/iTunes/iCloud Easily!


While these are the original video files we'll be using for the fish animations, they won't act exactly like Apple's stock live wallpapers when we're done.
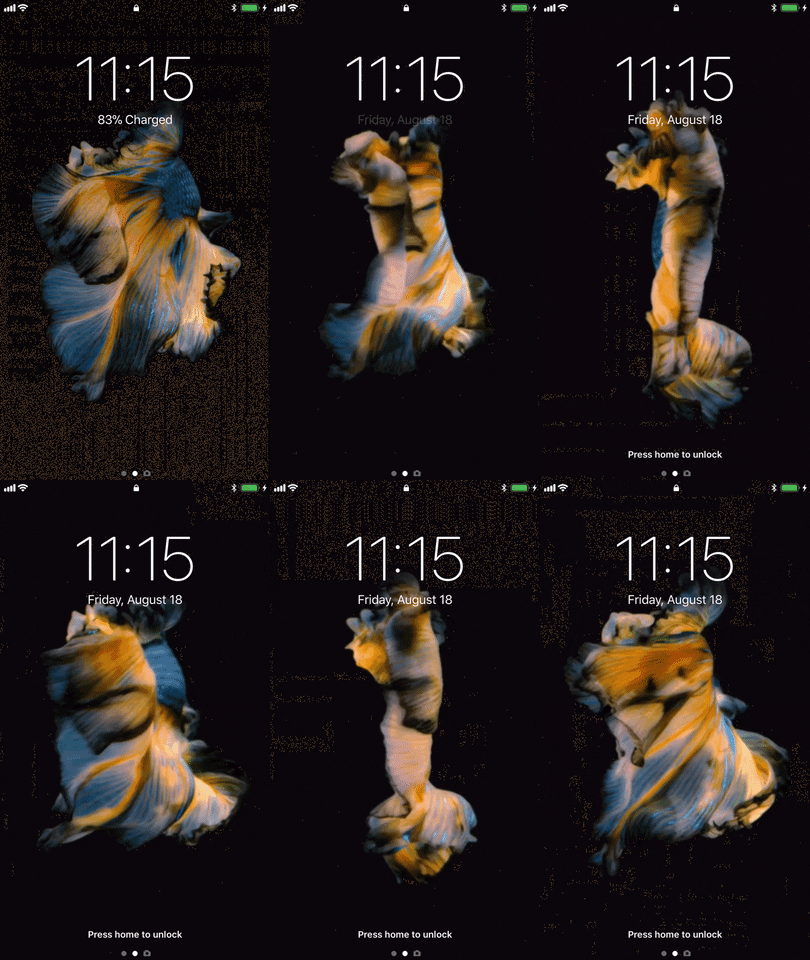
Apple's default live wallpapers not only animate when you use 3D Touch on the display, but they move faster or slower depending on how much force you apply. When you lift your finger off the screen, the animation reverses back to the first frame. The only way to simulate this right now is by using a jailbreak tweak, and there is no public iOS 11 jailbreak yet.
So our version of these fishy live wallpapers will act just like normal live photos that you turn into live wallpapers on your iPhone. They will animate when you use 3D Touch, but they will stop playing when they reach the end of the video, and they won't reverse back to the first frame.
Step 1Download the Fishy Files
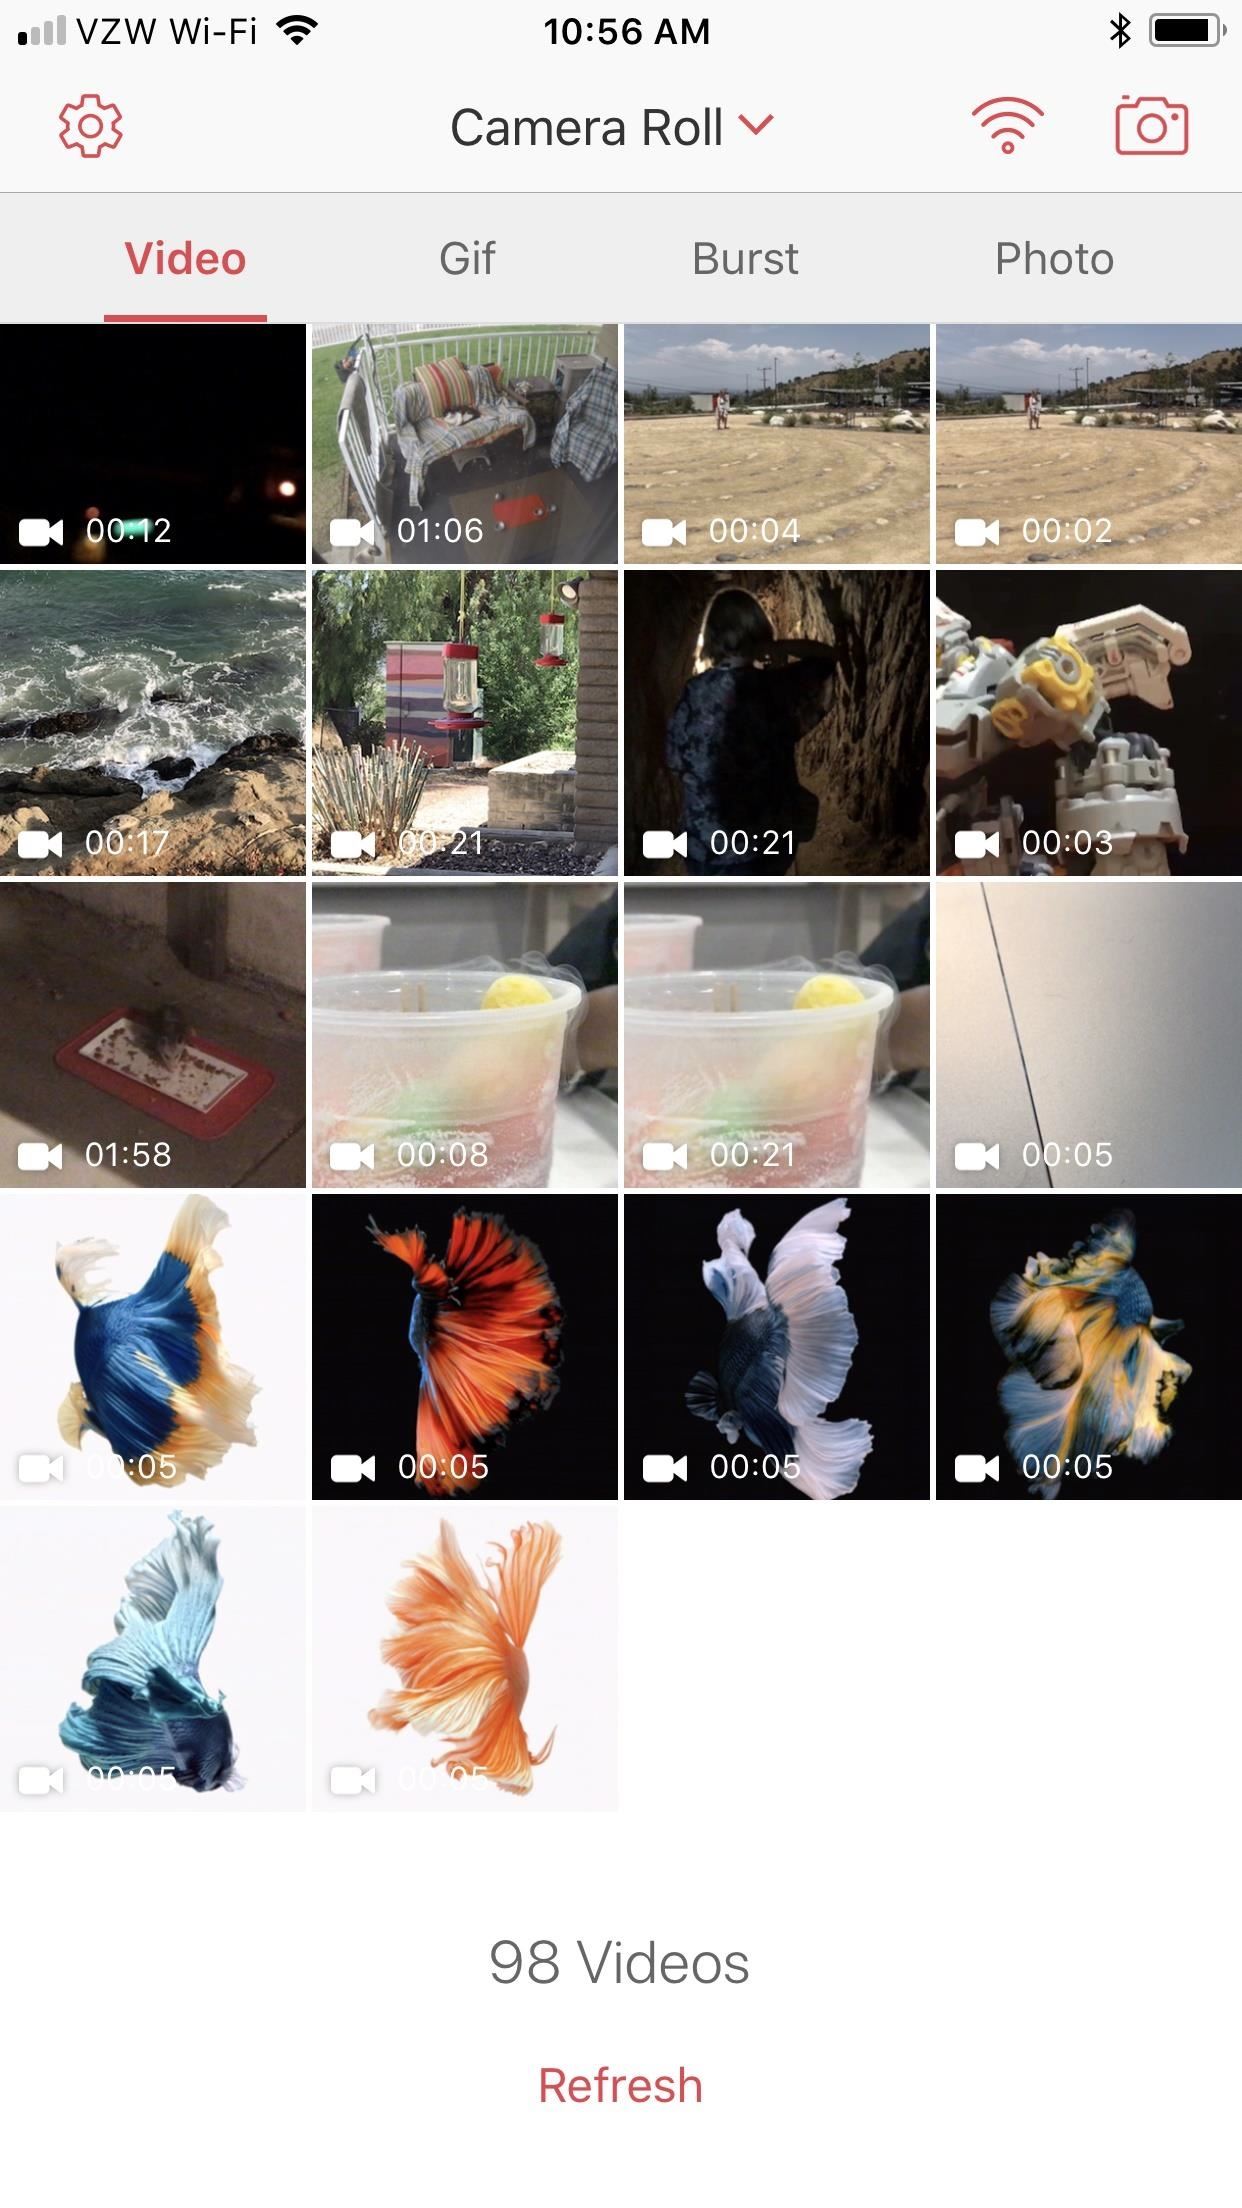
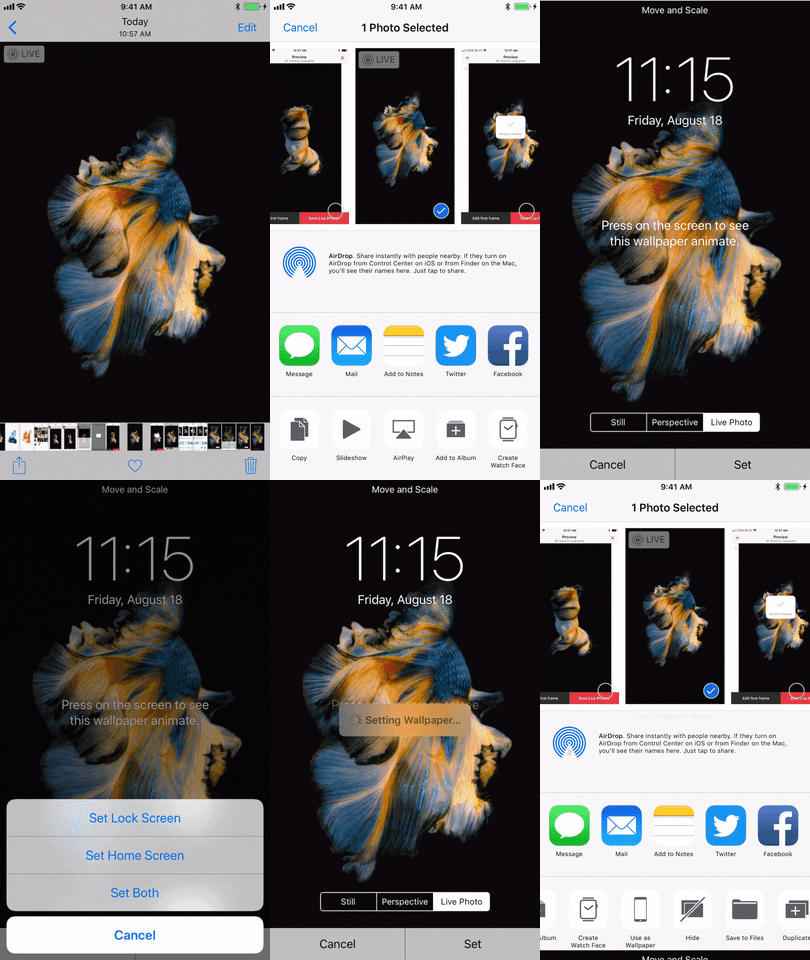
There are six live fish wallpapers that Apple removed in iOS 11, and all of them are linked individually below as .m4v video files. So just choose the ones that you like or download them all in a .zip file. If you choose the .zip file, you'll want to choose "More" in Safari, then "Save to Files." Then you can select "Preview Content" when viewing the .zip in the Files app, and use the share sheet to save each video to your Photos app.
Orange Fish on White Background
Light Blue Fish on White Background
Blue/Orange Fish on White Background Must Read:iMyFone D-Back iPhone Data Recovery–Recover Deleted Data from Your iPhone/iTunes/iCloud Easily!


Blue/Yellow Fish on Black Background
Blue/White Fish on Black Background
Blue/Red Fish on Black Background


Step 2Install a Video-to-Live-Photo Converter
In order to turn the .m4v video files into live photos, we'll need to use a conversion app. There are some good paid ones in the iOS App Store, but free is always better. You could use Live Maker or LiveMaker Free, but intoLive Pro has slightly better quality and more options for your finished product, so I'd recommend that.
Install intoLive Pro from the iOS App Store for free


Convert the Videos to Live Photos
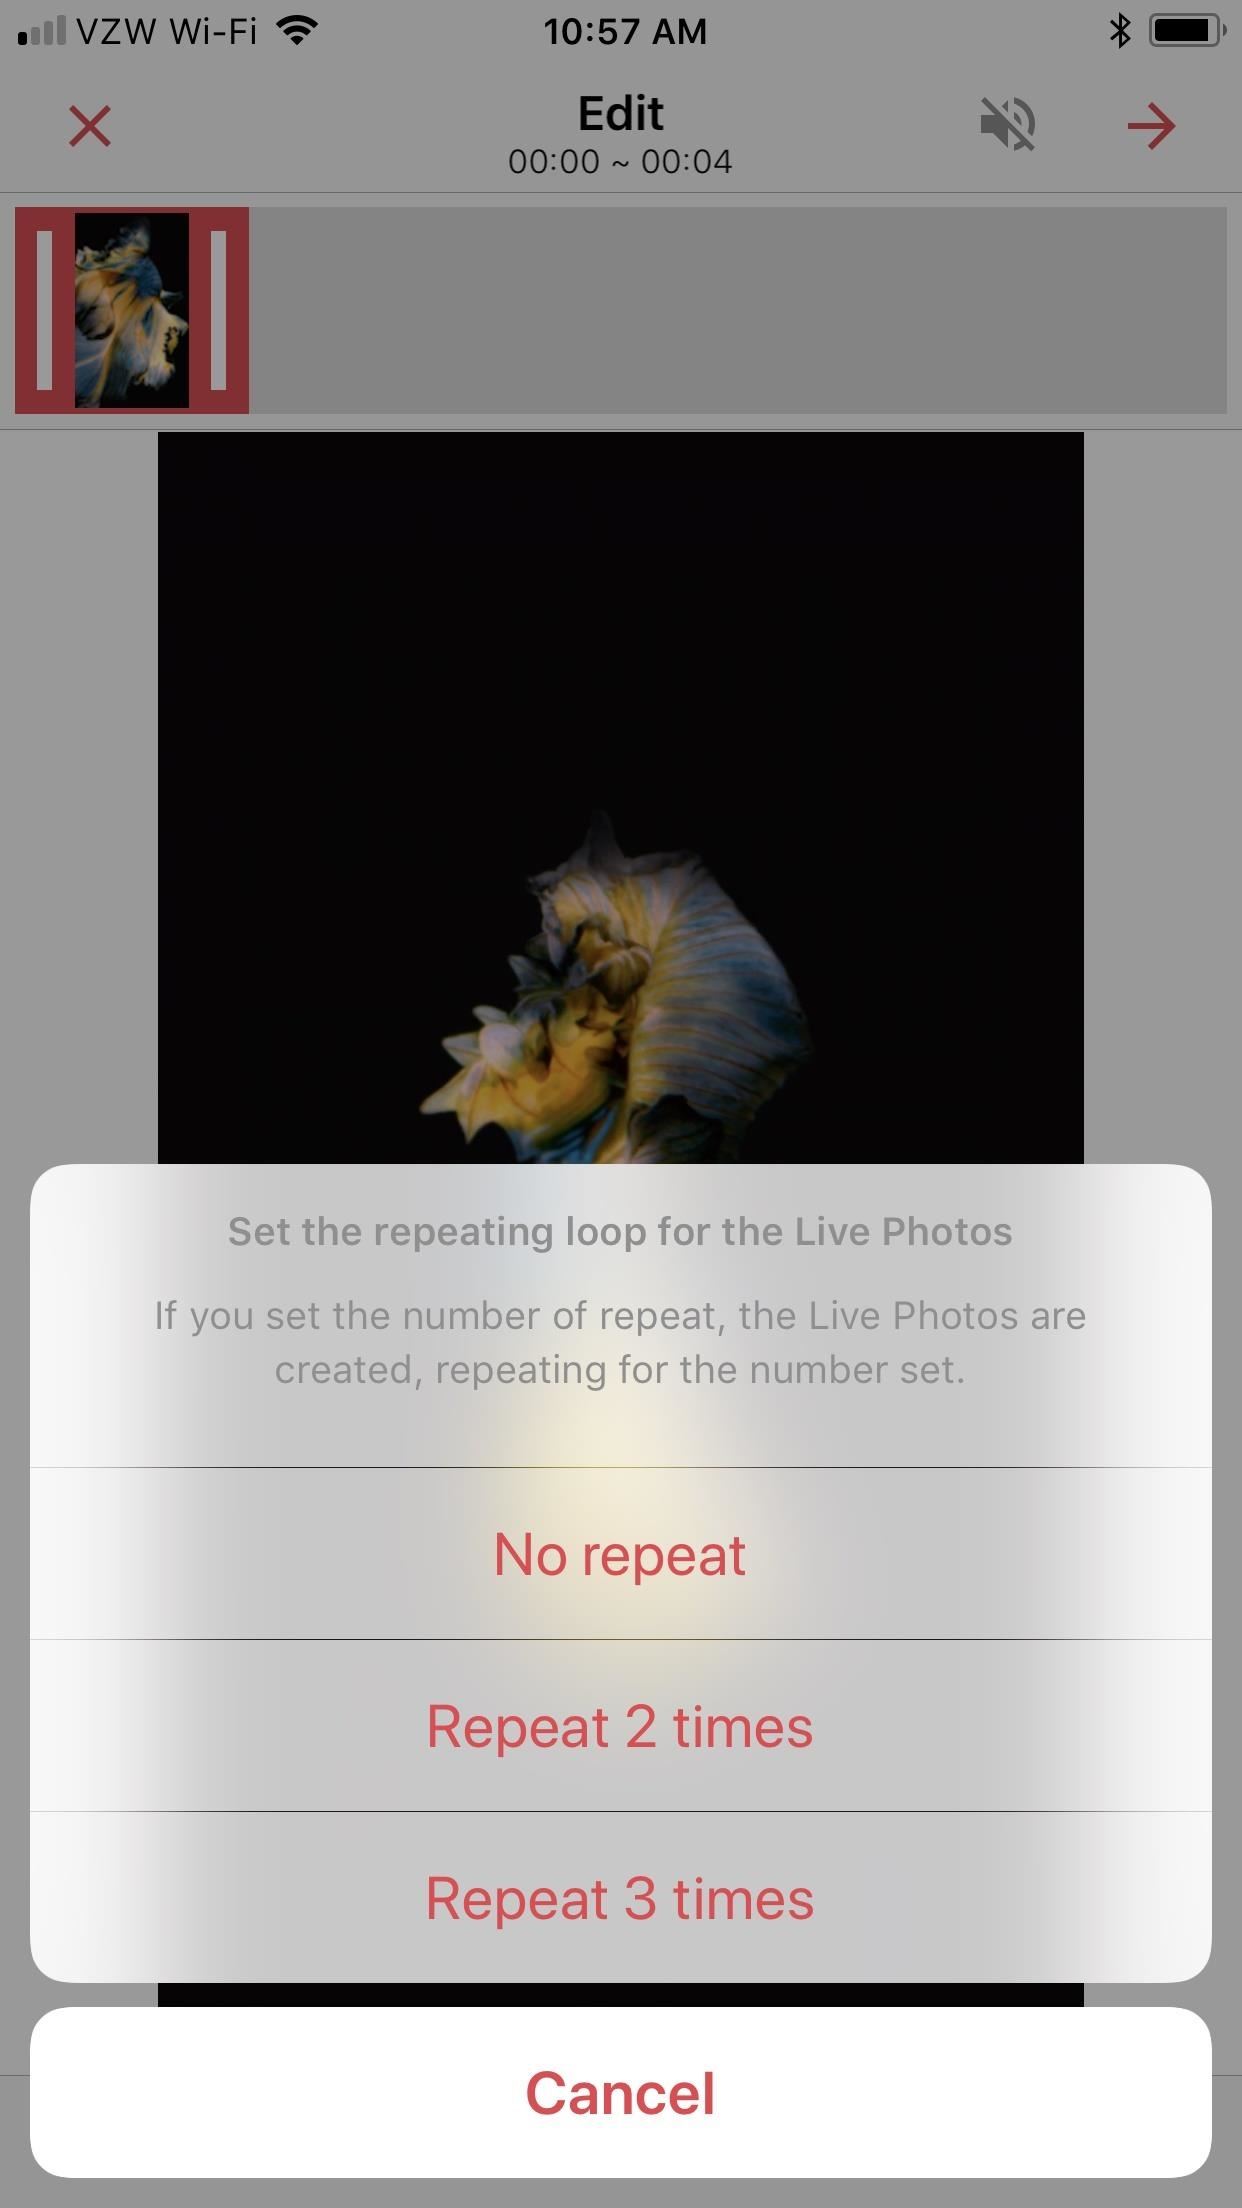
Open up the intoLive Pro app, make sure the "Video" tab is selected, then choose the fish video file you want to convert. On the edit screen, just tap the right arrow in the top right, then select whether or not you'd like to repeat the animation. You can make it play once, twice, or three times in a row.
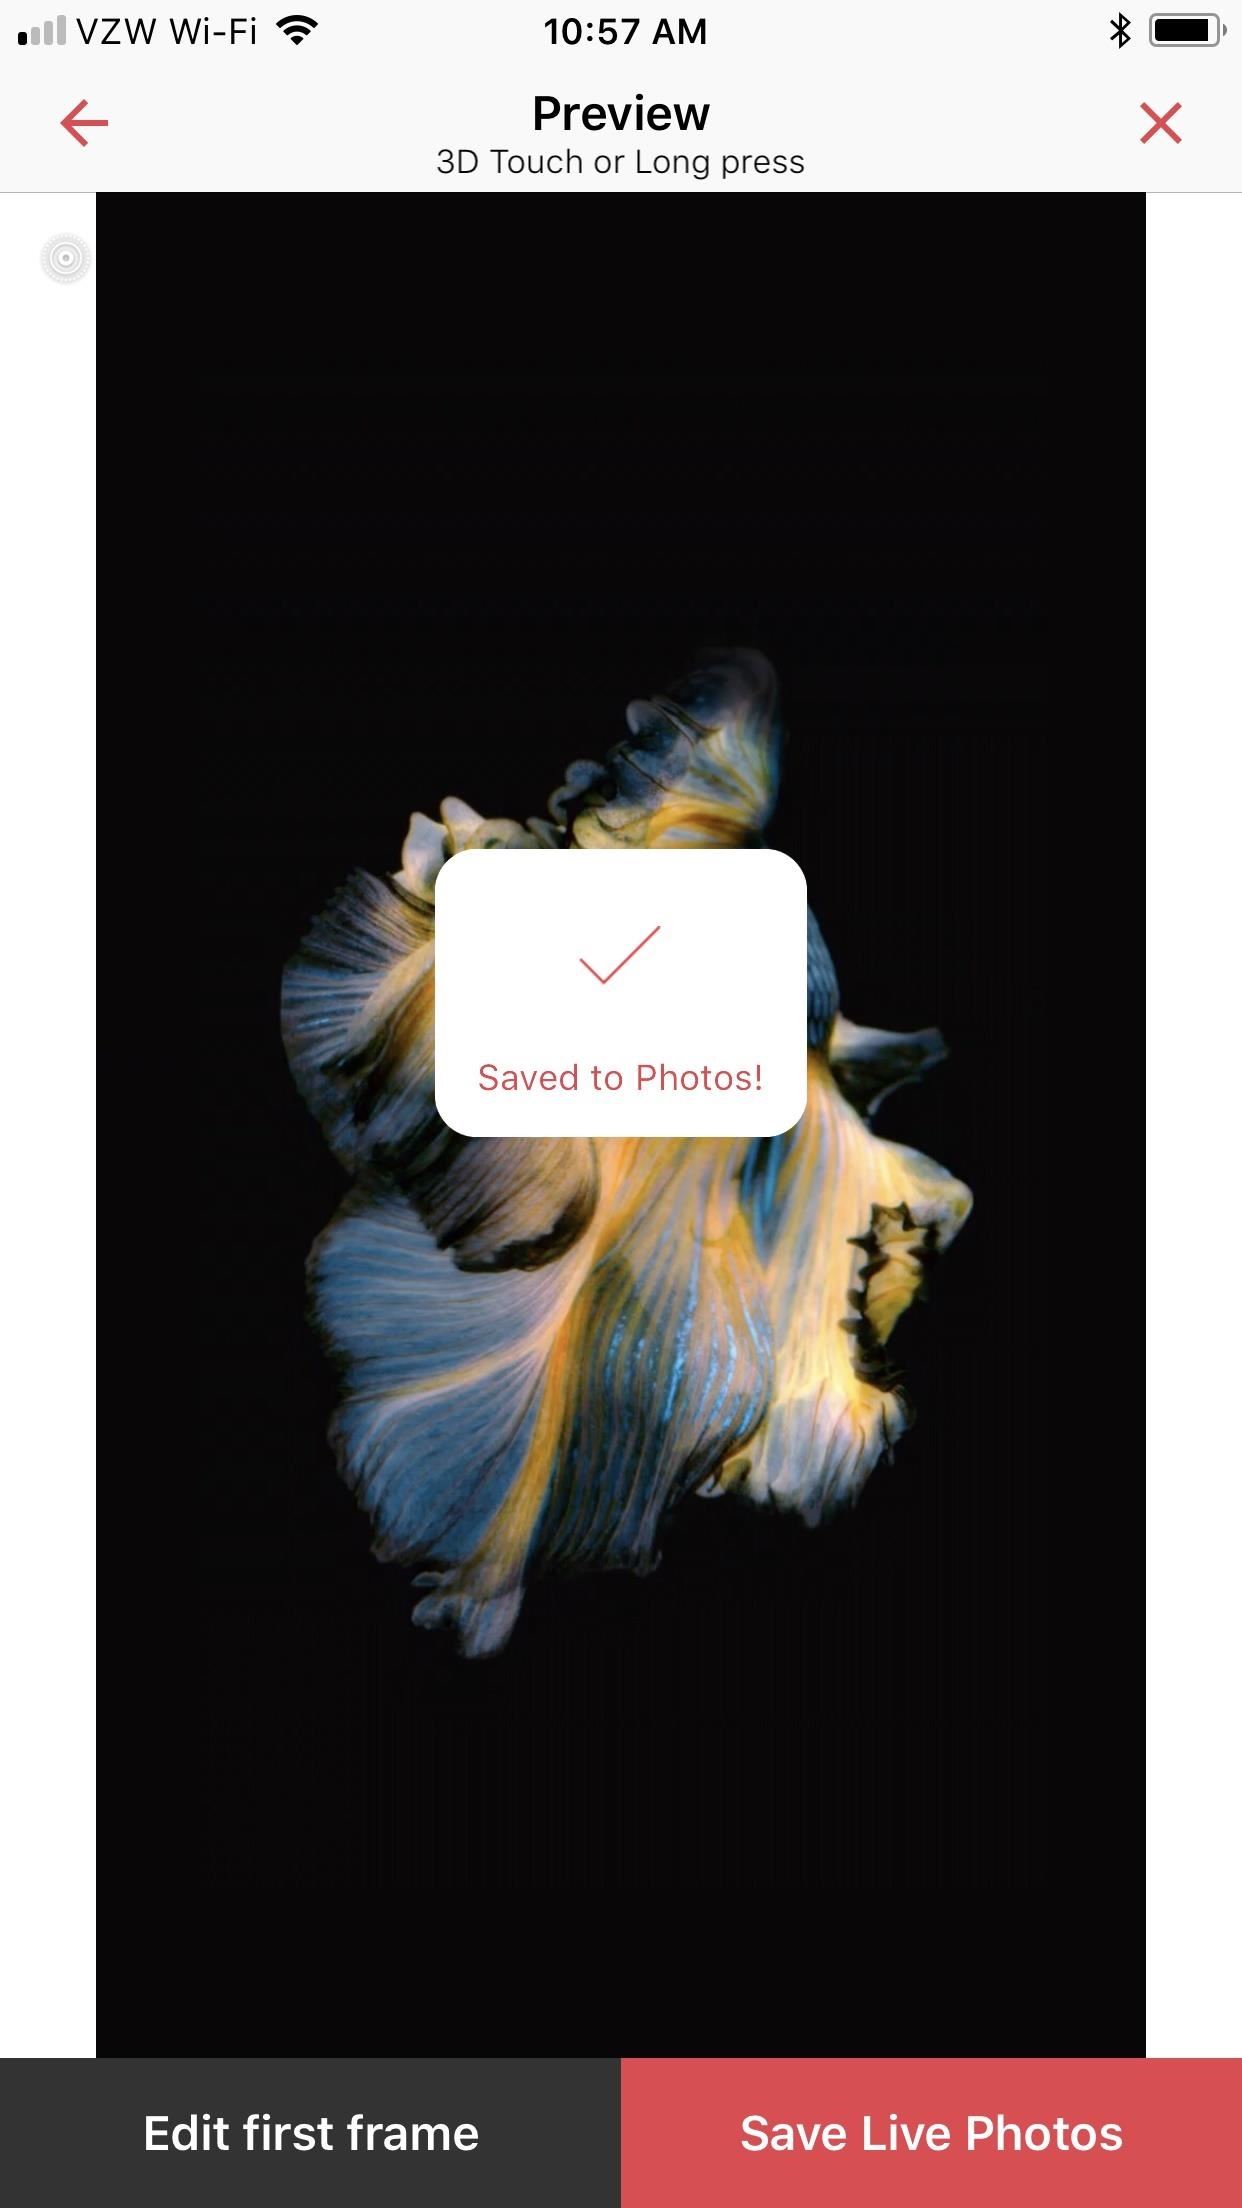
After you've made your choice, tap on "Save Live Photos" on the next screen and it will be saved to your Photos app as a live photo.


Step 4Set as Your Live Wallpaper
You can set your new live fish photo as your wallpaper by going to "Wallpaper" in the Settings app, selecting "Choose a New Wallpaper," and selecting your live photo. In this guide, however, I'll show you how to do it straight from the Photos app, so go ahead and open that up.
Open up the live photo, then tap the share sheet icon in the bottom left. On the bottom row of options, tap the "Upload as Wallpaper" option, then tap "Set." On the prompt, select "Set Lock Screen" and you're done.


Who knows, maybe Apple will bring back the live fish wallpapers in an update. If so, we'll update this guide accordingly. But chances are that Apple is readying some new live wallpapers for iOS 11's big public release.

How to Attach Attachments in Gmail for the iPhone ?

How to Attach Attachments in Gmail for the iPhone


While email is still an incredibly popular form of communication, it’s not always a part of everyone’s daily life. And if the time comes when you need to send a document, picture, or some other file using Gmail, you’ll need to know how to attach it.iMyFone D-Back iPhone Data Recovery–Recover Deleted Data from Your iPhone/iTunes/iCloud Easily! If you lost videos from iOS Camerall Roll which are nowhere to download again, you can use Gihosoft iPhone Data Recovery to get back deleted videos from iOS device including iPhone, iPad and iPod Touch.
Jihosoft iPhone Backup Extractor Extract and recover all types of data from iPhone backup files, such as camera roll photos, videos, SMS, contacts, reminders, WhatsApp, and etc.
Gihosoft Android data recovery Free is a super awesome software specialized in Android file recovery. With this program, you are able to recover deleted photos, music, videos, messages, contacts, call logs, WhatsApp messages, Viber chat history and more from Samsung, Huawei, LG, HTC, Motorola, Google, Oneplus, Sony, Lenovo, ZTE and other Android devices directly. Meanwhile, this Android data recovery software is available for both Windows and Mac platforms.


It may seem like a trivial thing to explain, especially to someone who spends a lot of time working with email. But for the population who doesn’t do this, it can honestly seem a bit daunting. The good news is that sending attachments is actually pretty simple. Let’s get to it.


Oftentimes, anything you’ll need to attach will first have to be downloaded. The primary exception here is if you need to actually take a picture of something. In that case, attaching the file directly in Gmail is the easiest way.

How to Attach an Image or Document in Gmail
This is likely the most common scenario in which you’ll need to attach a file, and thankfully, it’s also the most straightforward.
If you need to attach an image, go ahead and fire up Gmail and start a new email by tapping the “pen” button in the bottom right corner.


In the new email message, tap the little paperclip icon in the upper right. Choose the image you’d like to add—everything should show up in the Camera Roll, regardless of whether it’s a screenshot, camera image, or downloaded picture.

Note: If you need to first download the file, you can do so by long-pressing the image on the web and choosing “Save Image.”

The same pretty much applies for documents, though it can be a bit more convoluted. Since Gmail is a Google product, it directly integrates with Google Drive, which is the simplest way of attaching documents to your emails.
So, you’ll first need to make sure the file you want to attach is saved in Drive. In most scenarios, the document you need to attach is likely coming from another email, so the best thing you can do is open the attachment in Gmail, then tap the “Drive+” icon in the top right to save the file to Drive. You can then edit it in the appropriate Google Drive app: Docs, Sheets, or Slides.

From there, fire up Gmail again, hit the pen icon, then tap the paperclip. Choose “My Drive” and find your file. Easy peasy.

If the file you need to attach isn’t coming from another email, you can easily upload it by using the Google Drive app’s upload function. Just tap the “+” icon in the bottom corner, and then choose the “Upload” option. You can then attach said file to your email pretty easily.

How to Download and Attach Files that Aren’t Images or Documents
Due to the limited nature of iOS, downloading and attaching files—especially anything that isn’t a document or image—can be a challenge. It takes a bit of work if you plan on attaching an executable, zip, or some other sort of file.
The easiest workaround here is to save the file directly to Gmail.
When you download the file, Safari defaults to an “Open in…” box. Tap the “More” button here, and then choose the “Gmail” option.

Note: If Gmail isn’t an option here, scroll to the end of the first line and choose the “More” option. Slide the toggle next to Gmail to add it to your share sheet.

When you save a file to Gmail via the share sheet, Gmail automatically creates a new message with the file already attached and ready to send.

3 Ways to Find Apple ID Password

Find Apple ID Password from Two-factor Authentication for iOS 10 or Later Two-factor authentication on your iPhone or iPad is extra security...